Trigger a custom AI connection request message from your CRM into Dux-Soup using n8n
Difficulty: Advanced; including n8n, JavaScript, Zoho CRM API, Dux-Soup API and OpenAI API
This n8n integration allows you to automatically send randomised semi-personalised LinkedIn connection requests with Dux-Soup whenever a new lead event occurs in CRM.
In this guide, we use Zoho CRM as an example.
Step 1 - Create a Webhook in n8n and connect it to Zoho CRM
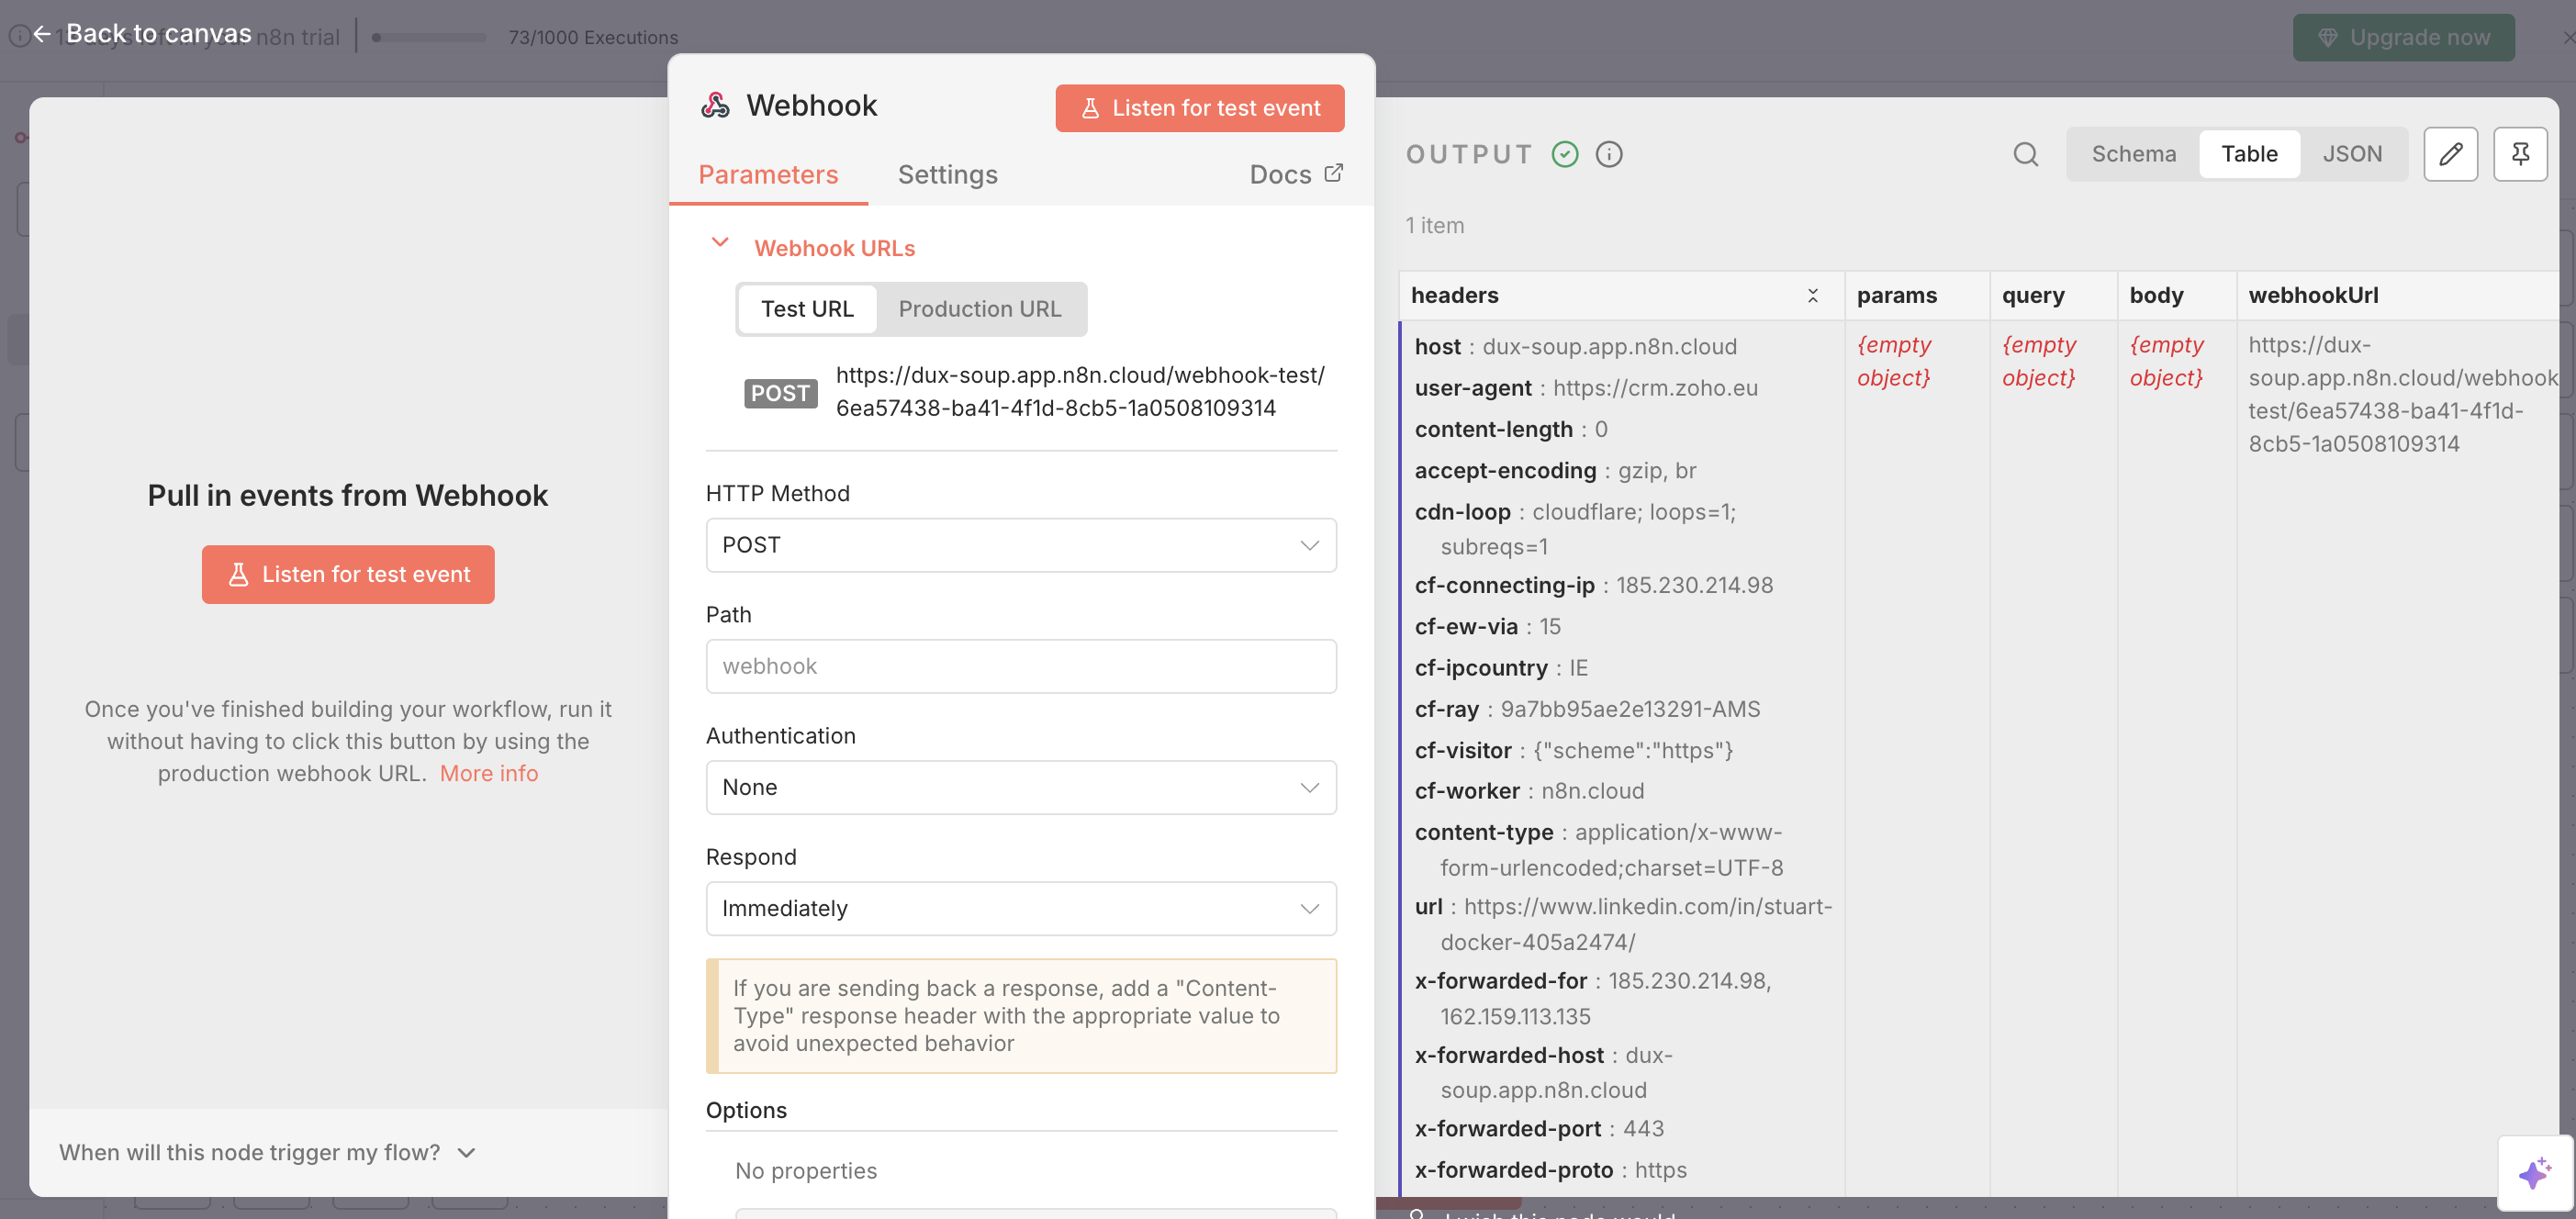
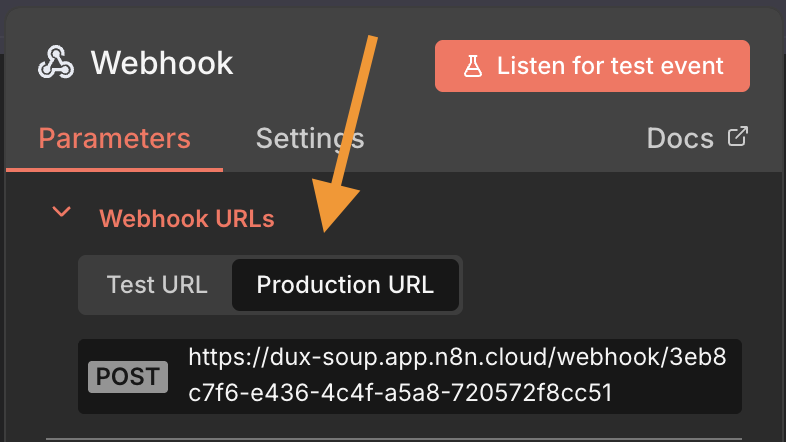
- Create a Webhook Node
- Set the HTTP method to POST
- Copy the Webhook URL
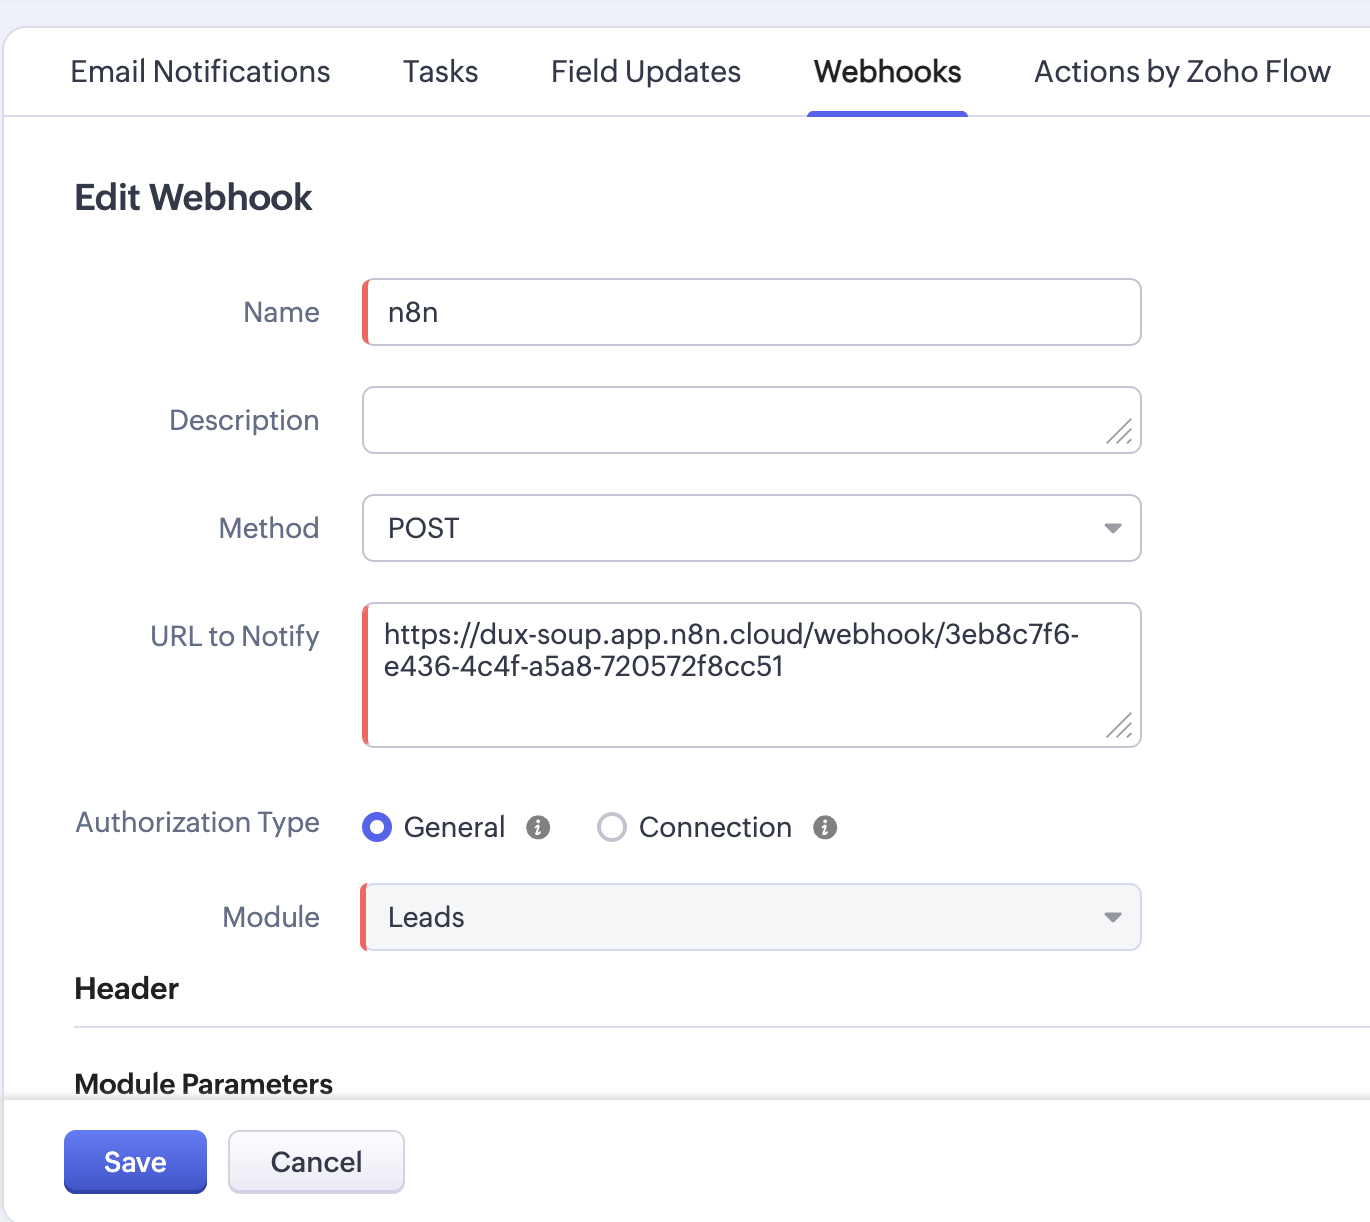
- Now paste the n8n webhook URL inside the Zoho webhook configuration.
Zoho → Setup → Automation → Webhooks → Configure Webhook

Paste the webhook, ensure the method remains POST, select the module 'Leads', and save the configuration.
- The webhook must be attached to a Workflow Rule to fire.
Zoho → Automation → Workflow Rules → Create Rule
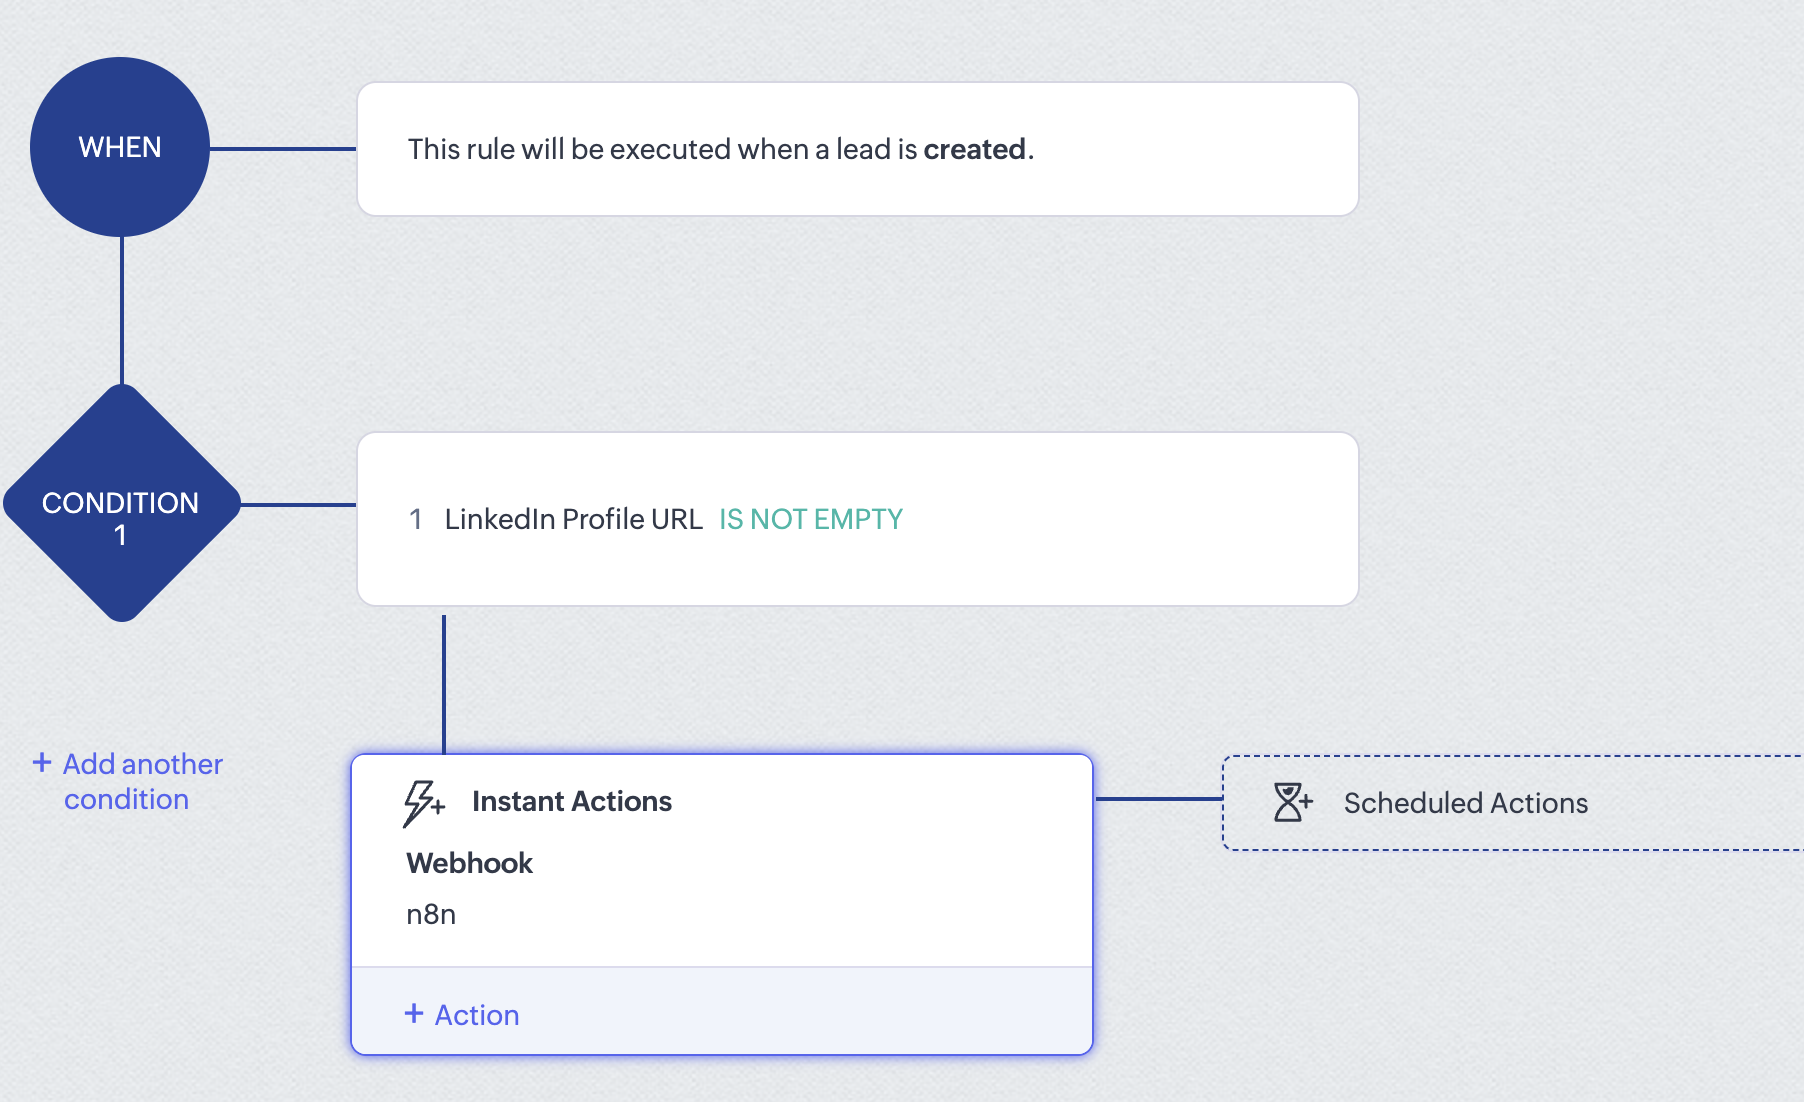
Establish a rule for when a lead is created, with the condition that the LinkedIn Profile URL is not empty. If this condition is met, the webhook should be triggered.
This is just an example; you may have a different field name containing the LinkedIn URL.
- Go back to the n8n workflow and click on Listen for test event
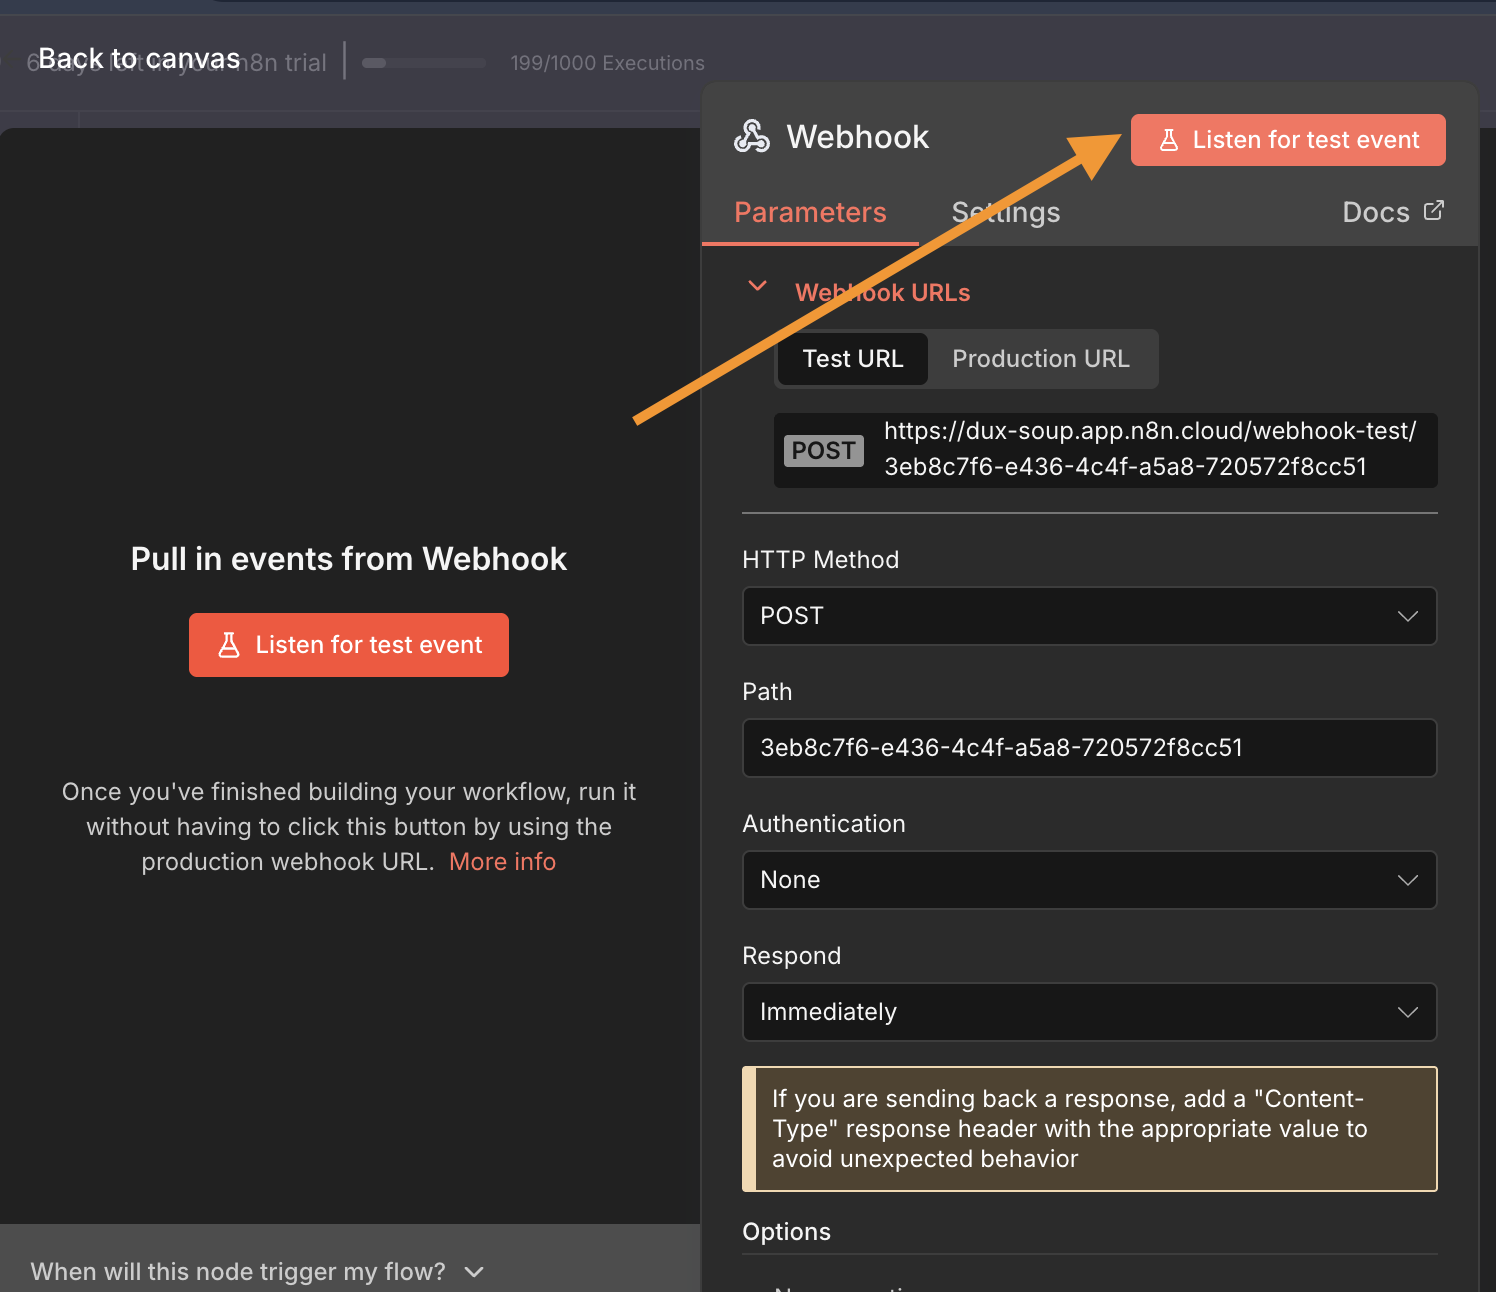
You should receive the Output fields on the right-hand side.
Step 2 - OpenAI Message Generation
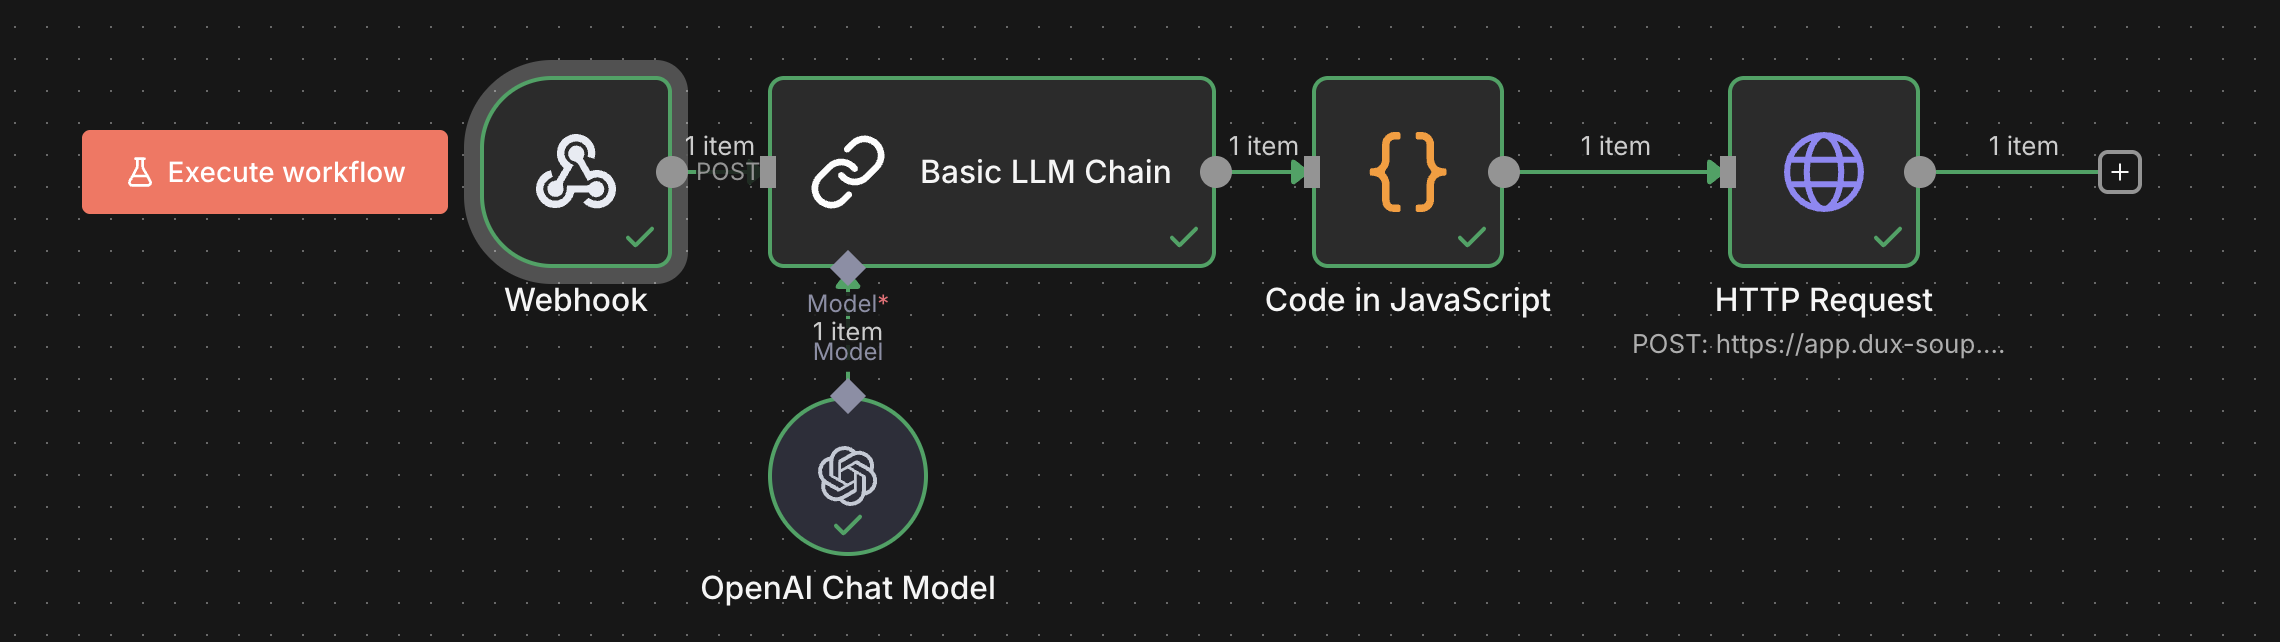
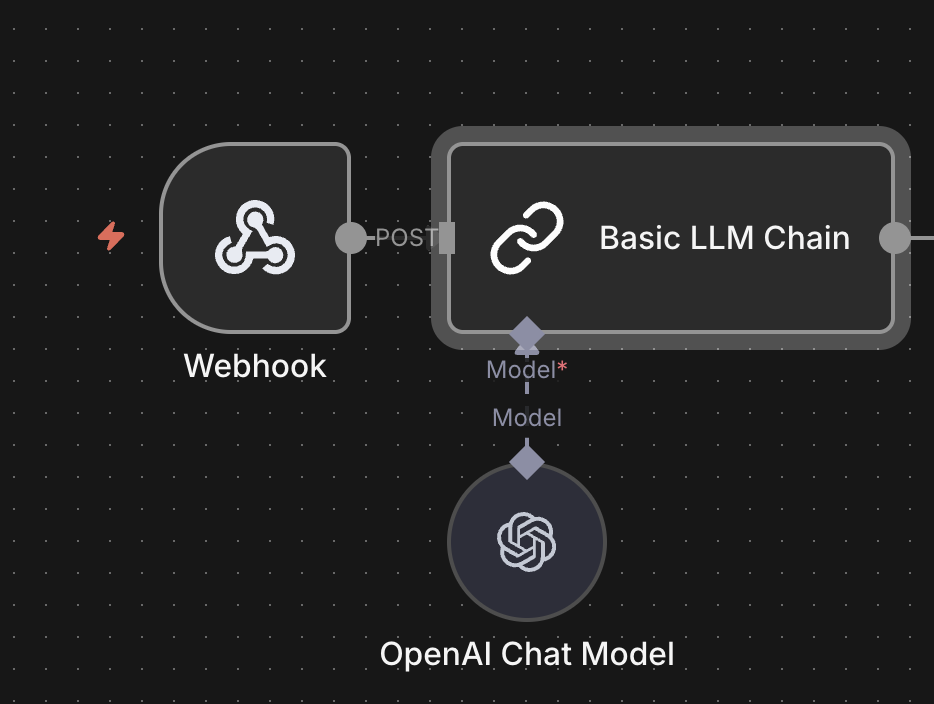
- Add the OpenAI Chat Model node in n8n. This node expands into three components:
- When Chat is Created (trigger — not needed for this workflow)
- Basic LLM Chain (where you will enter your message prompt)
- OpenAI (where you select your API account and model)
- Delete the “When Chat is Created” trigger — we are using the Zoho Webhook as the trigger instead.
- Connect Webhook → Basic LLM Chain as shown in the screenshot.
- Open the Basic LLM Chain node and set:
Source for Prompt → Define Below
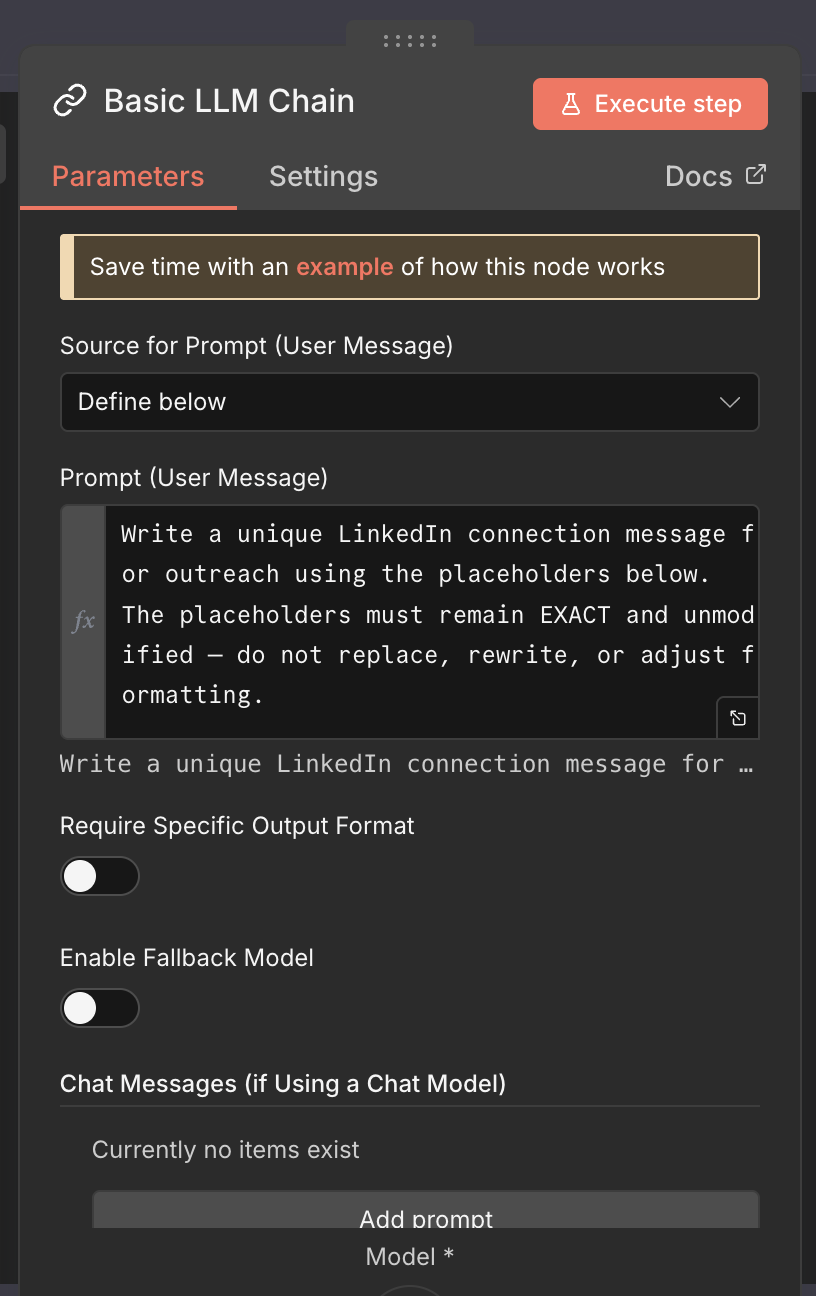
Since OpenAI cannot browse LinkedIn URLs, it must only use data you provide - no profile scraping, no live reading. Here is the recommended prompt designed for automation with Dux-Soup placeholders:
Write a unique LinkedIn connection message for outreach using the placeholders below.
The placeholders must remain EXACT and unmodified — do not replace, rewrite, or adjust formatting.

Required placeholders:
_FN_ (always included)
Randomly choose ONE of the following, but not more than one:
_CN_ / _TI_ / _IN_

Use whichever of these placeholders you select, and shape the message naturally around it.
Never use more than one of (_CN_, _TI_, _IN_) in a single message.

Example logic (NOT to copy directly):
If using _CN_ → "Hi _FN_, I enjoy connecting with people from companies like _CN_."
If using _TI_ → "Hi _FN_, great to see professionals working as _TI_."
If using _IN_ → "Hi _FN_, I enjoy meeting people in _IN_."

Rules:
- Maximum 280 characters.
- Tone warm, human and professional — no selling or pitching.
- DO NOT invent profile details. If required data is missing, write a general but friendly message.
- Message must sound natural and not repetitive.

Variation requirement:
Before writing, silently choose a random style seed from 1–10 to vary tone and sentence structure.
Use the seed to produce different output each time by altering phrasing, rhythm, and opening lines.
Do NOT reveal the seed.

Tone Mapping:
1–3 → concise & warm
4–6 → polished & professional
7–8 → slightly more detailed
9–10 → friendly & personable

Now generate the message using _FN_ and EXACTLY ONE placeholder chosen from (_CN_, _TI_, _IN_).
- Select your account and model in the OpenAI component
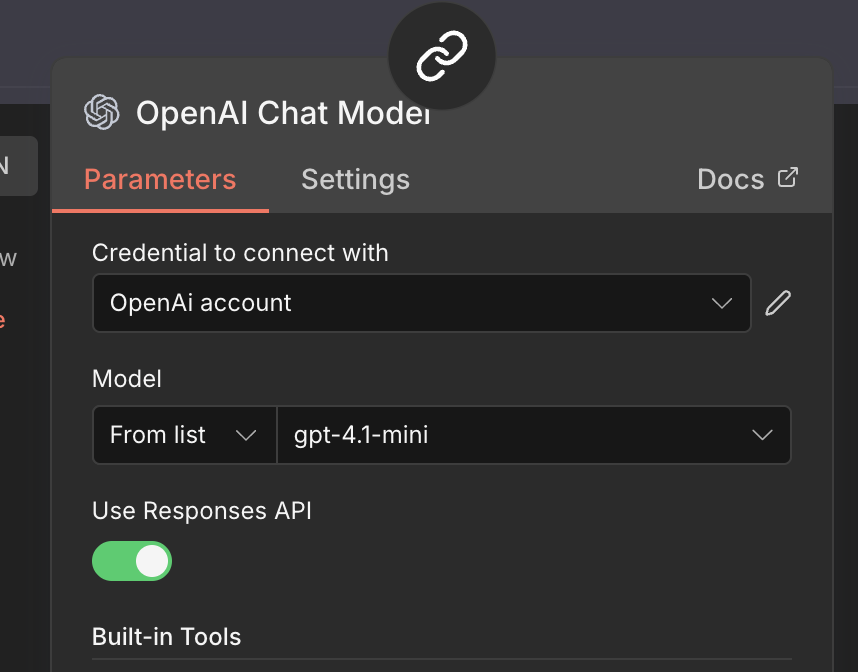
You are required to have an OpenAI credit or a linked payment method for this to work.
- Go back to the Basic LLM Chain component and execute the test step. You should see the message output on the right-hand side.
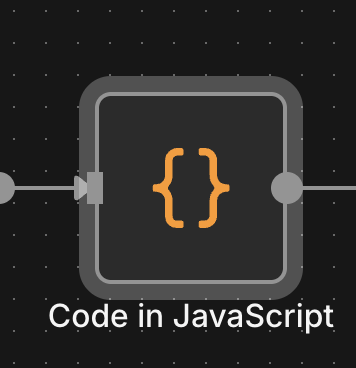
Step 3 - Code Node (Generate HMAC + Payload)
- Add a Code node after the Basic LLM Chain. In this guide, we use Code in JavaScript, but you can also do it in Python.
- Use this code:
// 1. Read data from previous nodes

// From the Webhook node (Zoho payload)
const webhookData = $node["Webhook"].json;

// If Zoho sends the profile in the body as "url"
const profileUrl = webhookData.headers.url;   // <-- change 'url' if your field name is different

// From the Basic LLM Chain (your AI-written message)
const llmData = $node["Basic LLM Chain"].json;
const messageText = llmData.text || "$input.first().json.text";   // The message the AI wrote

// 2. Dux-Soup credentials
const apiKey = 'DUXAPIKEY';  //  your Dux-Soup API key here
const userId = 'DUXUSERID';  // your Dux-Soup userid

// 3. Build payload Dux-Soup expects
const payload = {
  targeturl: `https://app.dux-soup.com/xapi/remote/control/${userId}/queue`,
  userid: userId,
  timestamp: Date.now(),
  command: 'connect',              // or 'message'
  params: {
    profile: profileUrl,
    messagetext: messageText
  }
};

// 4. Sign payload with HMAC SHA1 (Base64)
const crypto = require('crypto');
const hmac = crypto
  .createHmac('sha1', apiKey)
  .update(JSON.stringify(payload))
  .digest('base64');

// 5. Return for HTTP Request node
return [
  {
    json: {
      payload,
      hmac,
      profileUrl,
      messageText,
    },
  },
];
Step 4 - HTTP Request Node to Dux-Soup
- Add an HTTP Request Node with the following fields:
| Field | Value |
|---|---|
| URL | https://app.dux-soup.com/xapi/remote/control/<USER>/queue |
| Method | POST |
| Authentication | None |
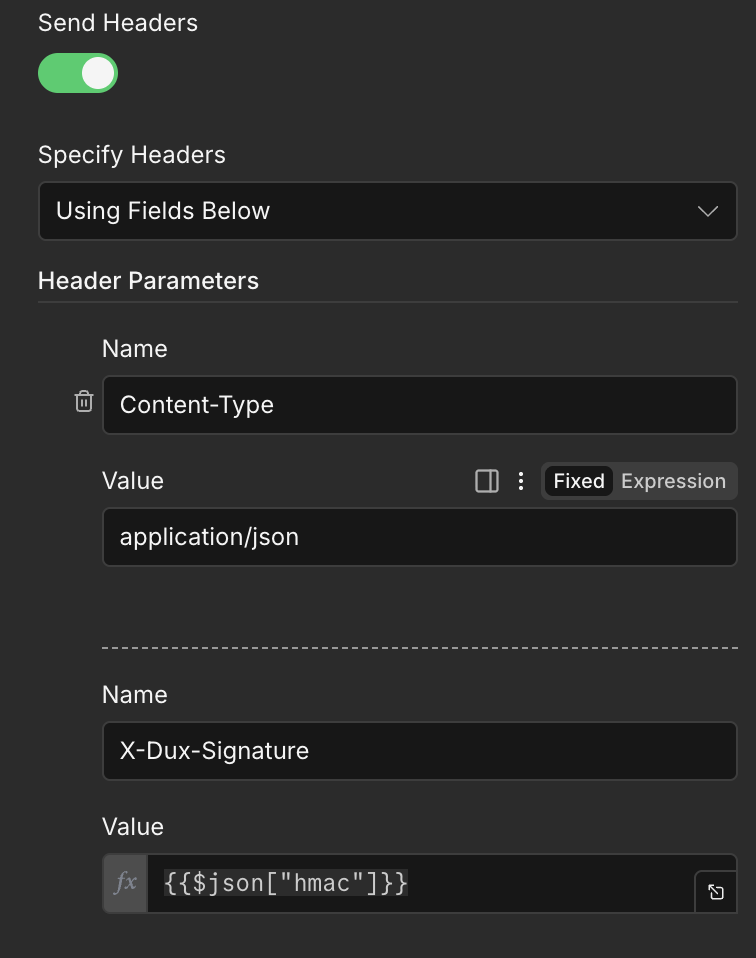
- Add the following Headers:
| Name | Value |
|---|---|
| Content-Type | application/json |
| X-Dux-Signature | {{$json["hmac"]}} |
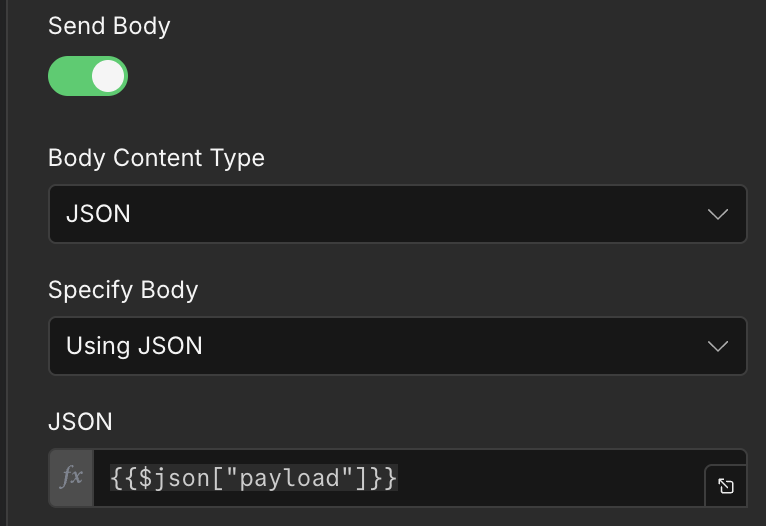
- Add the request body (RAW JSON, not wrapped in Body:):
{{$json["payload"]}}
- Execute the step. LinkedIn connection request is now queued automatically in Dux-Soup Queued Activity.

Important notes
Ensure you switch to the production webhook after the successful test and update your CRM webhook setup.
The API key and Remote Control URL can be found in the Dux-Soup extension → Options → Connect tab.
