How to automatically enroll a HubSpot contact into a Dux-Soup campaign
This tutorial will guide you through setting up a HubSpot workflow to automatically trigger a Dux-Soup "Enroll" action for a specific contact. This process uses a custom code action in HubSpot to communicate securely with the Dux-Soup API.
Use Cases:
- Combine Email w/LinkedIn for Multi-Channel Outreach in the workflow
- Automatically enroll someone into a HubSpot sequence and Dux-Soup campaign
- When added to a new segment or lead stage or deal then automatically reach out on LinkedIn
- Have someone be sent a connection request or direct message when they fill a form out from your website (thanks for contacting us and downloading this would love to connect)
Prerequisites
Before you begin, please ensure you have the following:
- A HubSpot account with access to Workflows (HubSpot Pro tier or higher).
- A Dux-Soup Turbo or Dux-Soup Cloud license (required for API access).
- The Dux-Soup HubSpot Connector is installed from the Dux-Dash (How to Install).
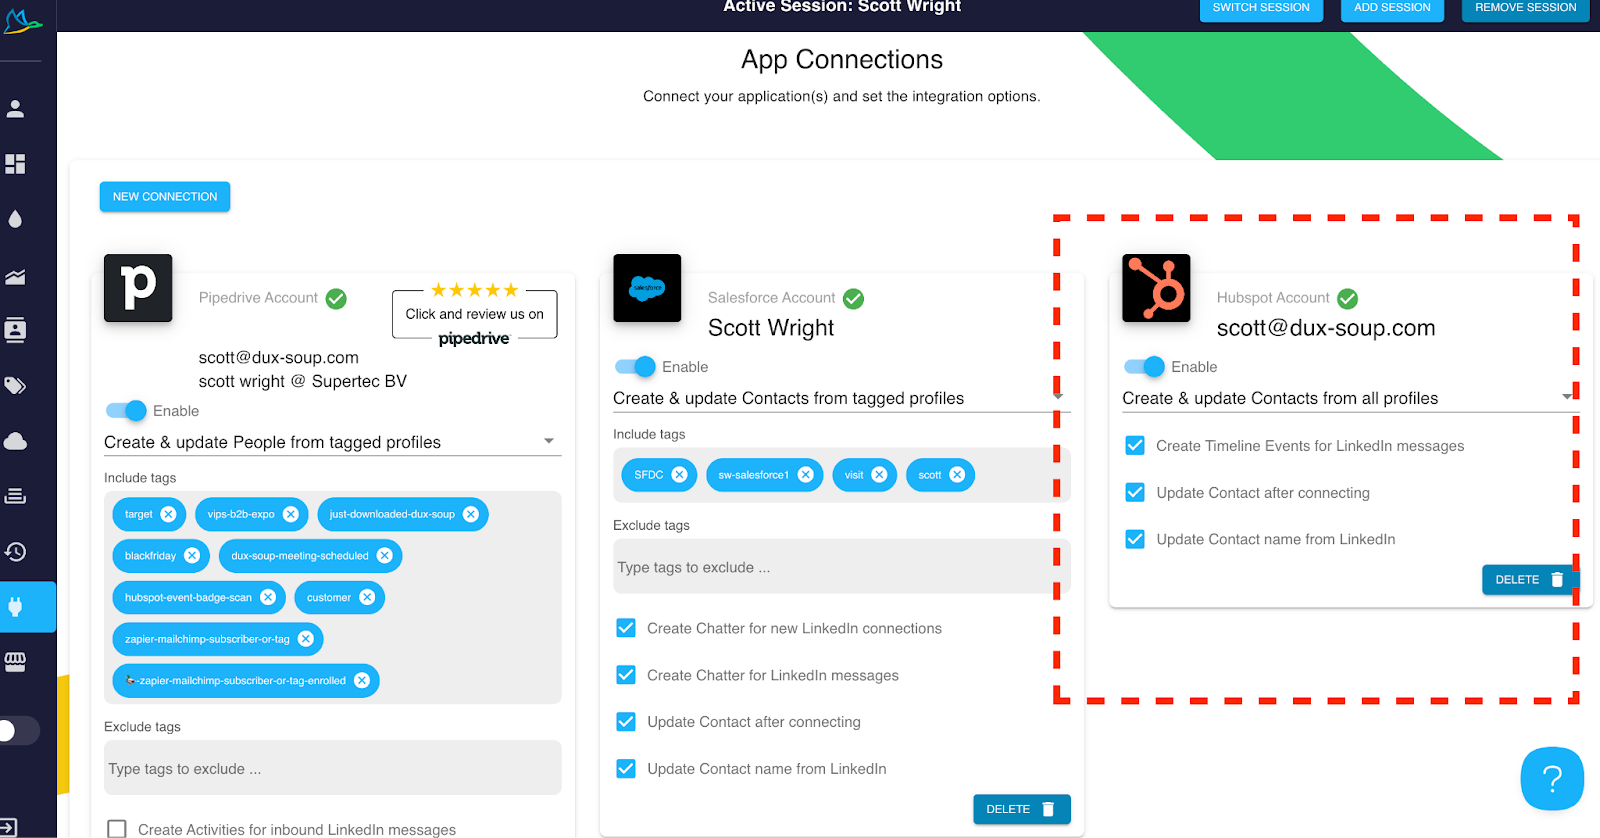
- A HubSpot contact that has the LinkedIn Profile field filled out with their respective LinkedIn profile (e.g., https://www.linkedin.com/in/username/) under the field “LinkedIn Profile”, NOT LinkedIn URL or anything else.

Step 1: Create Your Campaign in Dux-Soup
First, you must create the campaign in Dux-Soup that you want to enroll contacts into.
- Go to your Dux-Dash.
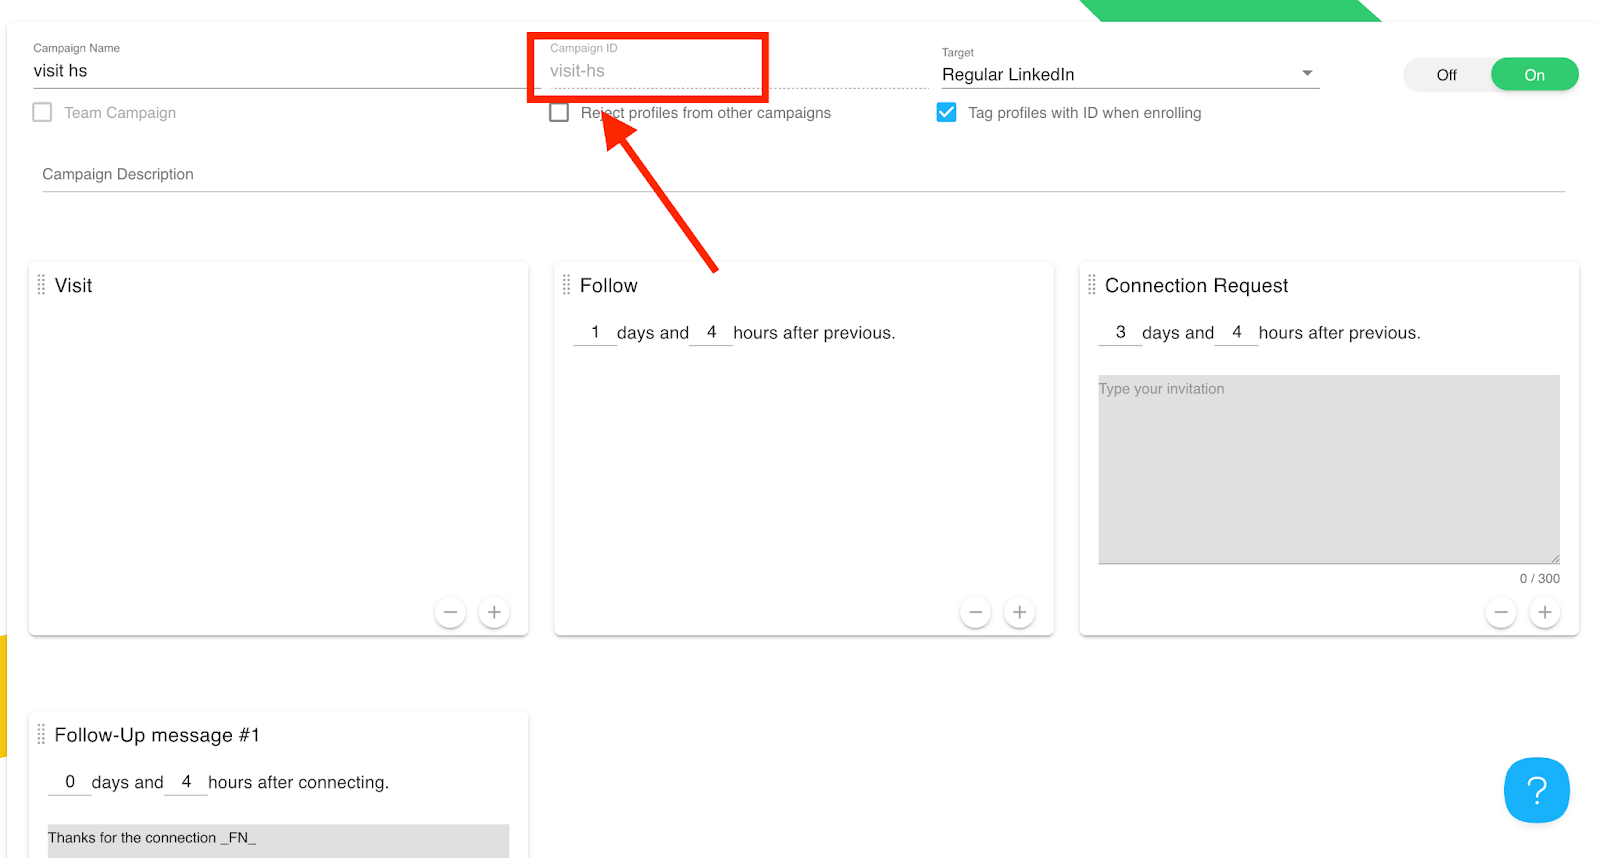
- Click "New Campaign" and give it a memorable name (e.g., visit-hs).
- Add the steps you want in the campaign (e.g., a profile visit, a connection request, etc.).
- Click [SAVE].
- It is crucial to copy the Campaign ID. The ID should be copied exactly as it is named, for example, 'visit-hs'. Please refer to the screenshot below.
Step 2: Get Your Dux-Soup API Credentials
You need to get your unique User ID and API Key to authenticate your requests.
- In the Dux-Dash, go to the Options tab.
Click on the Dux-Soup Extension and click on the ‘gear’ symbol.
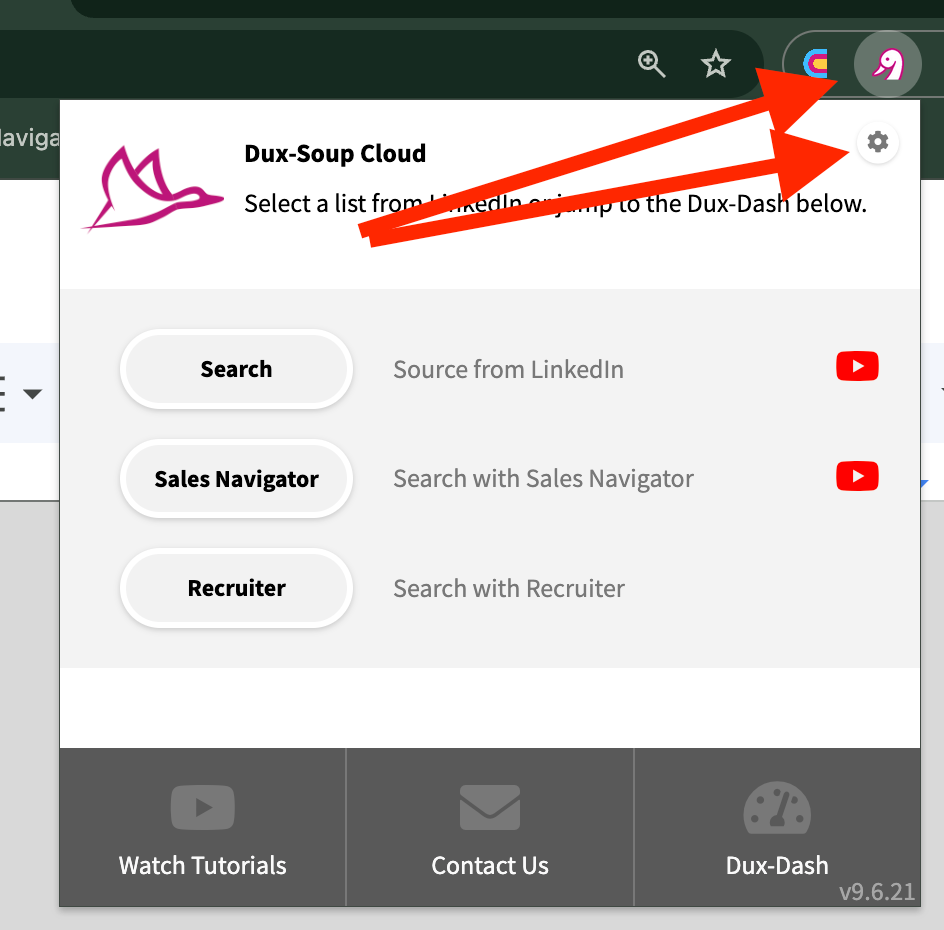
- Click on the Connect tab.
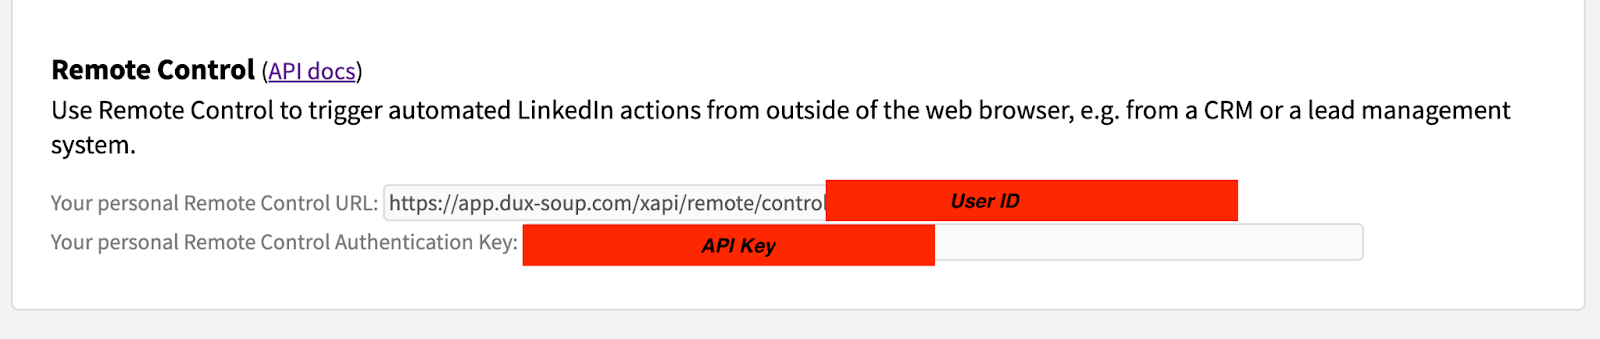
- Scroll down to the Dux-Soup Remote Control section.
- Copy your User ID and Key. Keep these in a safe, temporary place.
If you don’t see the Connect tab, enable the Expert mode and try again (read more here).
Step 3: Create the HubSpot Workflow
Go to HubSpot to build the workflow that will trigger the action.
- In HubSpot, navigate to Automation > Workflows.
- Click "Create workflow" > "From scratch".
- Choose "Contact-based" and click "Next".
- Set up your enrollment trigger. This is the event that will start the automation.
- Manually Triggered (this is good for connecting to other workflows)
- When a new person finishes a sequence
- When a new person is added to a segment list
- The example we are using is manually triggered, meaning it will trigger when we manually add a contact to the workflow
- Click the + icon to add an action.
Step 4: Configure the Custom Code Action
Add a "Custom code" action and securely configure it.
- In the "Choose an action" panel, scroll down to "Data ops" and select "Custom code".
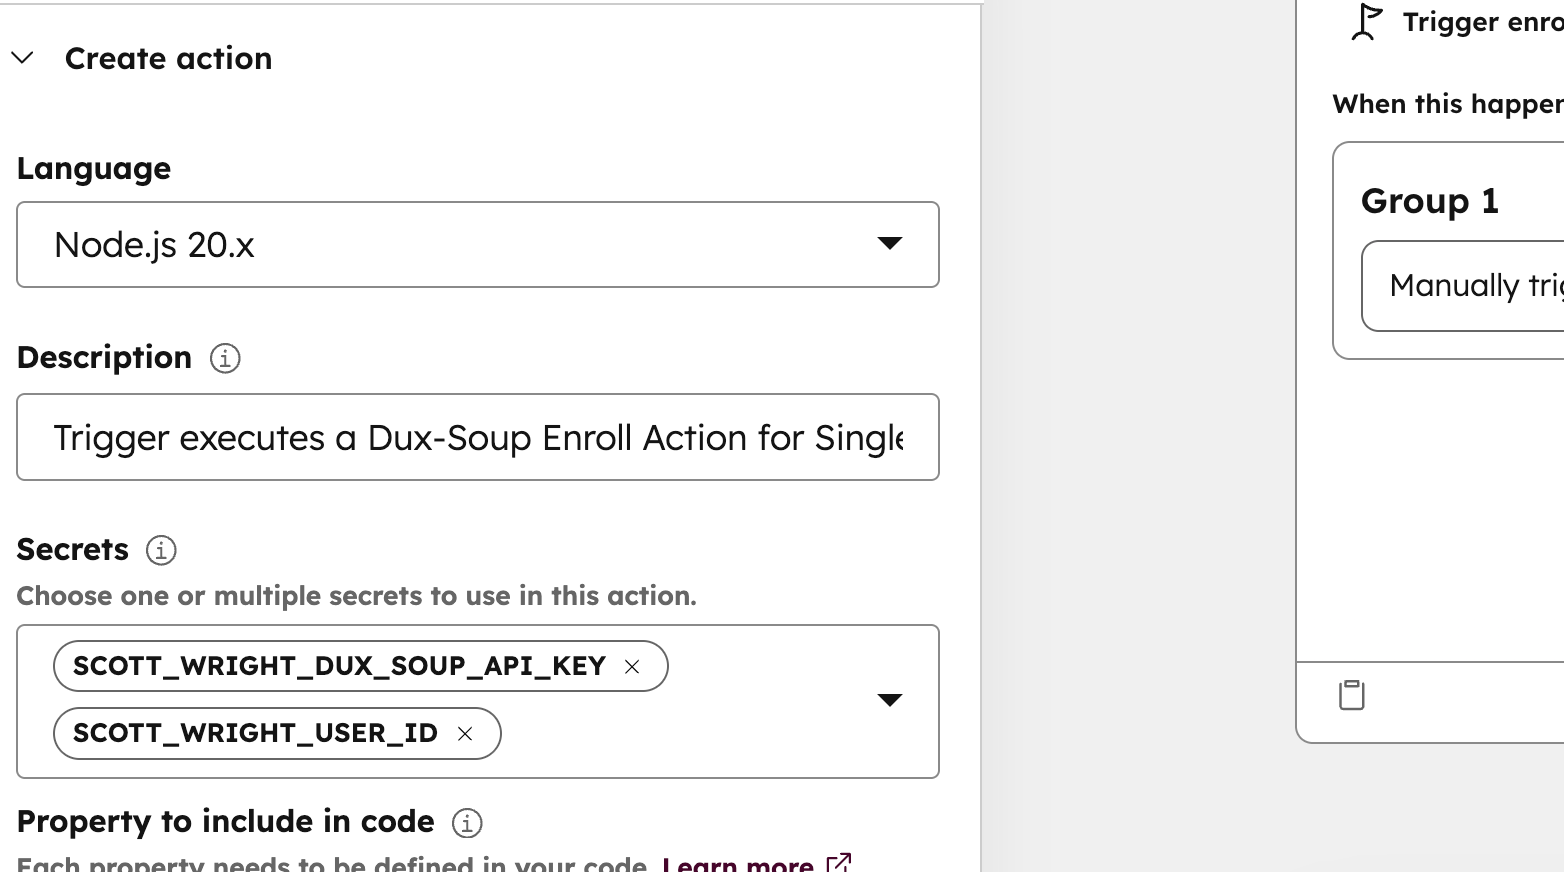
- On the left-hand panel, configure the following:
- In the "Secrets" section, click "Choose a secret" > "Add secret" and enter your Dux-Soup API Key.
- E.g. SCOTT_WRIGHT_DUX_SOUP_API_KEY
- Paste the API Key you copied from the Dux-Soup Connect tab in Options from Step 2. Usually it is a string of numbers and letters
- Click "Add secret" again.
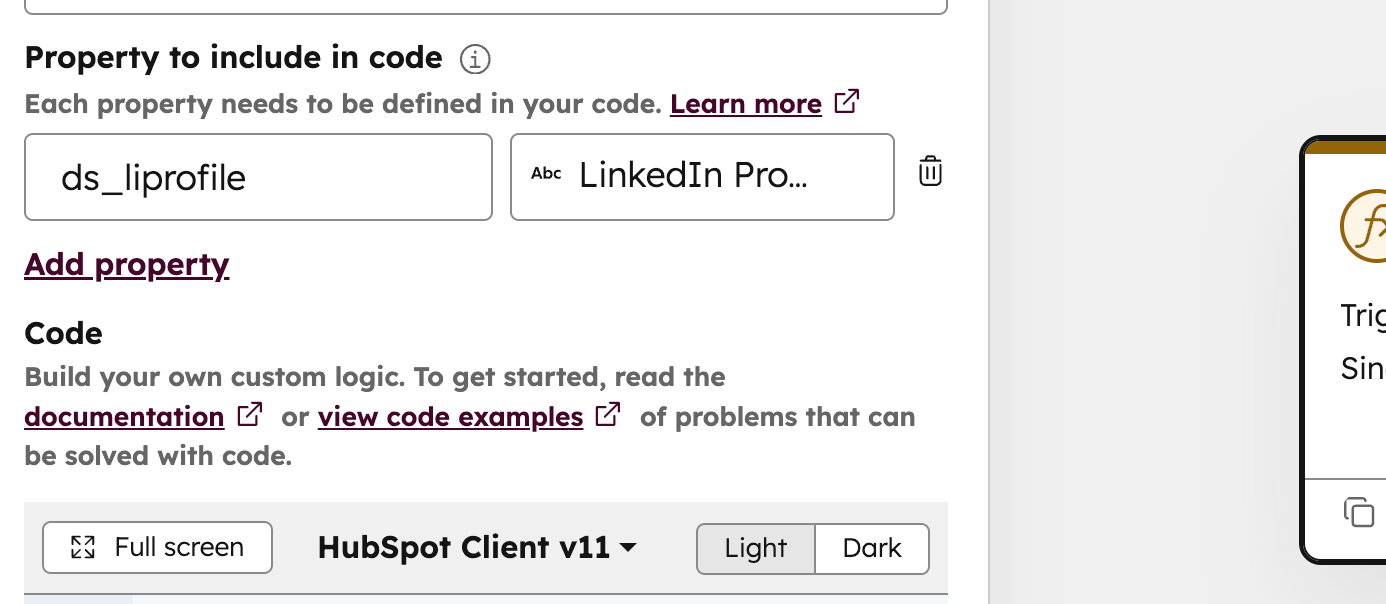
- Map the LinkedIn Property. This tells the code which HubSpot field contains the contact's LinkedIn URL.
- In the "Property to include in code" section, click "Add property".
- Key: ds_liprofile
- Property: Click "Select a property" and choose your HubSpot contact property that stores the LinkedIn Profile URL. This must be the field containing the profile URL. Do not use other fields like "LinkedIn URL" if they are not the correct data source.
- LinkedIn Profile (case sensitive, NOT LinkedIn Profile URL or LinkedIn URL).
- Confirm it says ds_liprofile (see below)
Step 5: Add the Custom Code
- In the main "Code" box, make sure the "Language" is set to Node.js 18.x.
- Delete all the placeholder code in the box.
- Copy and paste the entire script below.
- Ensure that you replace the confidential key names with the ones you have created below.
- Also, make sure to replace the name of the campaign you intend to use.
// Import the required libraries. 'axios' is for making HTTP requests, 'crypto' is for the signature.
const axios = require('axios');
const crypto = require('crypto');

exports.main = async (event, callback) => {
  // --- 1. Get your Secrets ---
  // These names MUST exactly match the Secrets you created in Step 4.
  const apiKey = process.env.SCOTT_WRIGHT_DUX_SOUP_API_KEY;
  const userId = process.env.SCOTT_WRIGHT_DUX_SOUP_USER_ID;

  // --- 2. Get your Contact's LinkedIn URL ---
  // This 'ds_liprofile' MUST exactly match the Key you created in Step 4.
  const profileUrl = event.inputFields['ds_liprofile'];

  // Check if we have all the data we need
  if (!profileUrl) {
    console.error("LinkedIn Profile URL is missing.");
    return callback({
      outputFields: {
        hs_execution_state: "FAILED",
        status: "error",
        message: "LinkedIn Profile URL is missing from contact."
      }
    });
  }

  // --- 4. Build the API Request (just like your script) ---
  const apiUrl = `https://app.dux-soup.com/xapi/remote/control/${userId}/queue`;
  const timestamp = Date.now();

  // This payload format is based on your API Test Tool's cURL command.
  const payload = {
    targeturl: apiUrl,
    userid: userId,
    timestamp: timestamp,
    params: {
      profile: profileUrl,
      force: true, // 'force' is included from your test tool setup
      campaignid: "visit-hs" // <-- This MUST match your Campaign ID from Step 1.
    },
    command: "enroll"
  };

  // Convert the payload object to a JSON string
  const payloadString = JSON.stringify(payload);

  // --- 5. Generate the HMAC-SHA1 Signature ---
  const hmac = crypto.createHmac('sha1', apiKey);
  hmac.update(payloadString);
  const signature = hmac.digest('base64');

  // --- 6. Send the Request to Dux-Soup ---
  try {
    const response = await axios.post(apiUrl, payloadString, {
      headers: {
        'X-Dux-Signature': signature,
        'Content-Type': 'application/json'
      }
    });

    // Success! Send data back to HubSpot.
    console.log("Successfully queued visit:", response.data);
    callback({
      outputFields: {
        status: 'success',
        message: JSON.stringify(response.data)
      }
    });

  } catch (error) {
    // Handle any errors
    const errorMessage = error.response ? JSON.stringify(error.response.data) : error.message;
    console.error("Error queuing visit:", errorMessage);

    // Send error data back to HubSpot
    callback({
      outputFields: {
        status: 'error',
        message: errorMessage
      }
    });
  }
};
Step 6: Final Configuration and Testing
- Customise the Campaign ID: In the code you just pasted, find Line 47: campaignid: "visit-hs". Change "visit-hs" to the exact Campaign ID you created in Step 1.
- Click "Save" in the top right of the action panel.
- You can now "Test action" in the left panel by selecting a contact who has a LinkedIn Profile URL.
- Once you're satisfied, click "Review and publish" to turn your workflow on.
Troubleshooting
- "My Workflow Says 'Success', but Nothing Happened" The Dux-Soup API works as a queue. HubSpot's "success" means the command was sent successfully. Your Dux-Soup Chrome extension must be running and logged into LinkedIn to pick up the command and execute it. Check your Dux-Dash Queued Activity page to see the command waiting.
- "My Test Contact Isn't Enrolling" If you have tested on a contact (e.g., with a visit action), Dux-Soup may "lock" that contact and prevent them from being enrolled. To fix this, go to your Dux-Dash Funnel Flow, find the contact, click the checkbox next to their name, and select "Qualify Out". This resets the contact, making them eligible for enrollment.
- Using the 'Default' Campaign. As noted in your document, if you send a campaignid that does not exist in your Dux-Dash, Dux-Soup will automatically enroll the contact into your "Default" campaign.
- Dux-Soup doesn't let you enroll 1 person into the same campaign. So you may need to create a new campaign for a person when conducting multiple tests.
Notes
- One workflow is for one Dux-Soup user
- Want multiple Dux users? Create Multiple separate workflows
- One workflow is tied to a specific campaign for that user
- Want multiple different campaigns for different use cases? Create separate HubSpot workflows for each Dux-Soup campaign for that Dux-Soup user.
- Use one campaign, and when you want to change it, then adjust the campaign in the Dux-Dash read more about editing active campaigns here
- You may want to have your triggers in HubSpot be ‘manual enrollment’. This will allow you to easily enroll from other areas of HubSpot, like Segments (lists), by selecting who you want in the segment view of HubSpot and then enroll them on the HubSpot workflow that enrolls them in the Dux-Soup campaign.
- Use this HubSpot workflow to start/stop or trigger other workflows in HubSpot for different things
For inquiries regarding this workflow, please contact Scott Wright, Head of Sales at Dux-Soup, via email at scott@dux-soup.com.